
 Craft supplies tend to reproduce if you don’t watch them carefully. This blog was created as a result of paint procreation that I allowed to get out of hand. Unfortunately, my hoard is not limited to paint. It also includes fabric, ribbon, paper ephemera and recently I’ve noticed that my washi tape collection is multiplying.
I know I’m not the only girl out there with this problem, so I decided to make some wall organizers that address the specific needs of crafters. This piece is the first of four organizers I’m building to help prevent craft overload.
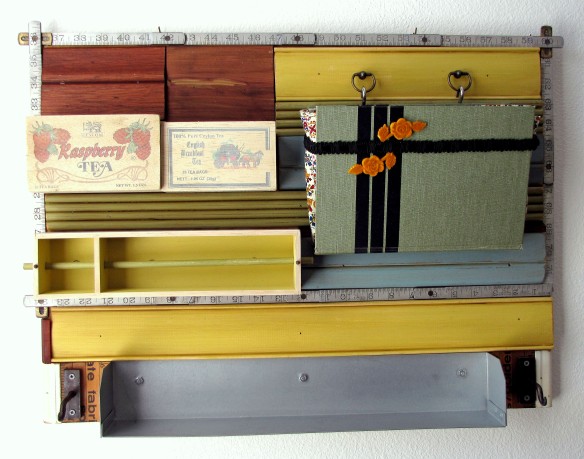
 The left side of this organizer has two small wooden tea crates that are perfect for holding stickers, small scrapbook pads and SMASH book pads. They could also hold markers and pencils.
Beneath them is a washi tape holder I made from a little box I picked up at an estate sale. The dowel is removable so you can add or subtract rolls as needed. It will hold at least a dozen rolls which is more than any one person should have (at least one normal person….I’m not talking about tape hoarders).
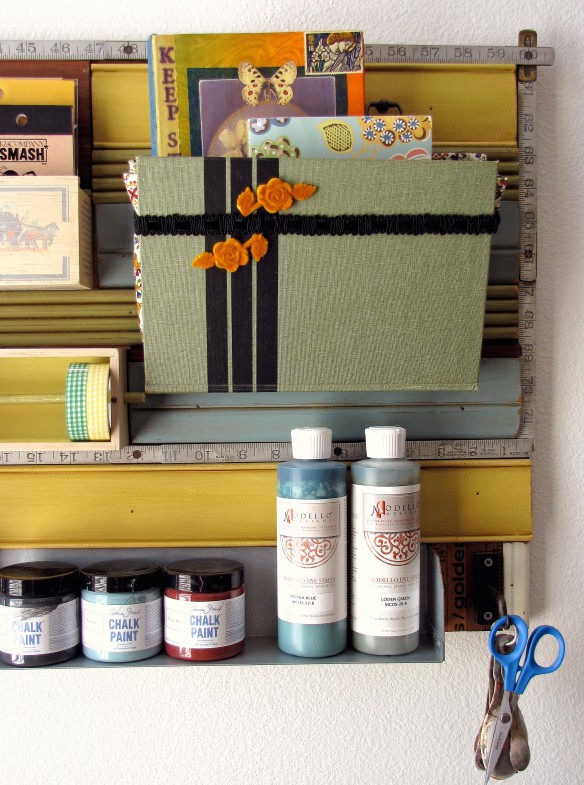 The right side of the organizer has a medium size mail holder that I made from an old speedreading text book. The lining was made from a vintage cotton fabric and the book is decorated with black felt ribbon and two flocked resin roses. It hangs from two s-hooks hanging from two vintage drawer pulls. It’s the perfect size for journals or sewing patterns.
Along the bottom of the piece is a galvanized steel shelf that I made from whatever the heck this thing is……..I have no idea. It’s really sturdy and the perfect size for craft paints, glue and bottles of glitter.
On either side of the shelf are two wrought iron hooks I bought at Kobey’s swap meet. They look rusted, but I sprayed a clear topcoat on them so the rust won’t rub off on to anything.
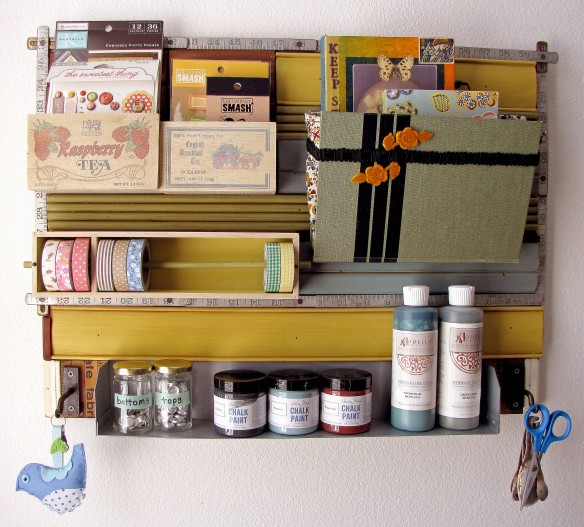 Around the top section I’ve attached an old metal folding ruler, just because it looks cool. All the wood moldings are salvaged, but the paint finishes are new.
It’s a great little piece and I’m really happy with how it came out. It would look great in a craft room or above a childs’ art space. It’s available in my Etsy shop now.
One down, three more to go!
Inventory used: latex paint, craft paint, Stain & Seal


