Status Report

You may have not noticed, but I’ve been absent from the blogoshpere. (You probably didn’t notice, but just humor me for right now) I decided to take a break from blogging to see what life would look like without it. In a nutshell, if I don’t take time to post to my blog I get a lot more done.

I started this blog mostly to document the destashing of my paint stock, but also to advertise my work. I had hoped I could bring in some income either by selling my salvaged pieces or creating a money-making blog. Having been born to parents with Hoosier work ethics, the drive to produce never takes a break. It’s a little voice in my head saying, “Surely you could be doing something better with your time.” (It’s constant…….and stop calling me Shirley) If I’m not working, I’m feeling guilty about not working. There is no other option available to me. Even though I have made a little money, it seems to take a lot of time engaged in marketing to get results. I’m figuring out that I really don’t enjoy all the time I have to spend on the computer, but mostly because it’s keeping me from painting and fixing things. So I took a month off to just work and I’ve been very productive.

I’ve been working on getting this house ready to be sold this summer. During a recent home appraisal it was brought to my attention that my work on the design of our home had taken it from the starter home we bought in 2001, to a home that will now sell at the high end of our development. The phrase “bidding war” has been thrown around, which is really exciting.

As a result I have decided that the best way to contribute to our income is to make this house a knockout. So I’ve been working my way through the house restoring every part to it’s original condition, or upgrading it to be even better. I know this is all good material for blog posts, but here’s where I’m at; blogging slows me down. And secondly, a lot of what I’m doing is boring, and definitely not worth photographing. For example, I spent a fair amount of time this week scrubbing, staining and restoring the original finish to worn areas on my bathroom vanity. I know…….mind-numbing.

I am committed to the challenge of this blog and will continue to post significant projects that involve whittling down my stash, but it’s not going to be an every day thing. I am getting way more work done by not constantly posting. I also feel especially good about not filling your inbox with details about the grunge that builds up in window tracks when you don’t clean them for 13 years. Be glad I saved you from that photo. Gross!

I think we can all feel good about that.

Making a Jewelry Organizer From Junk

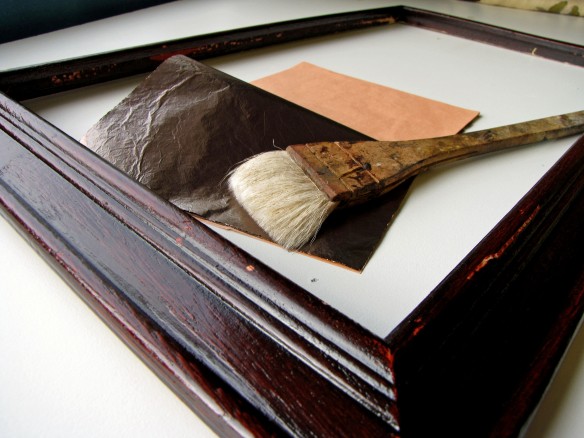
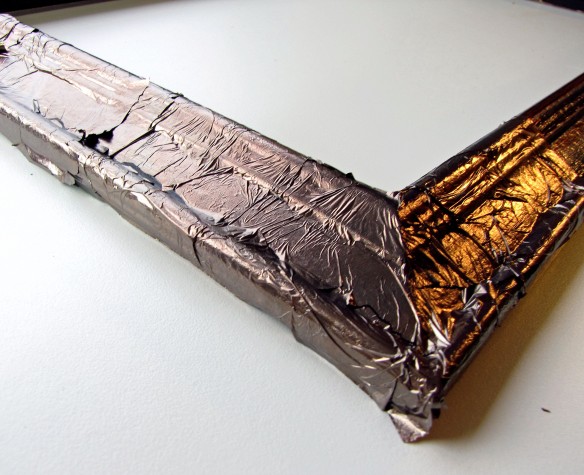
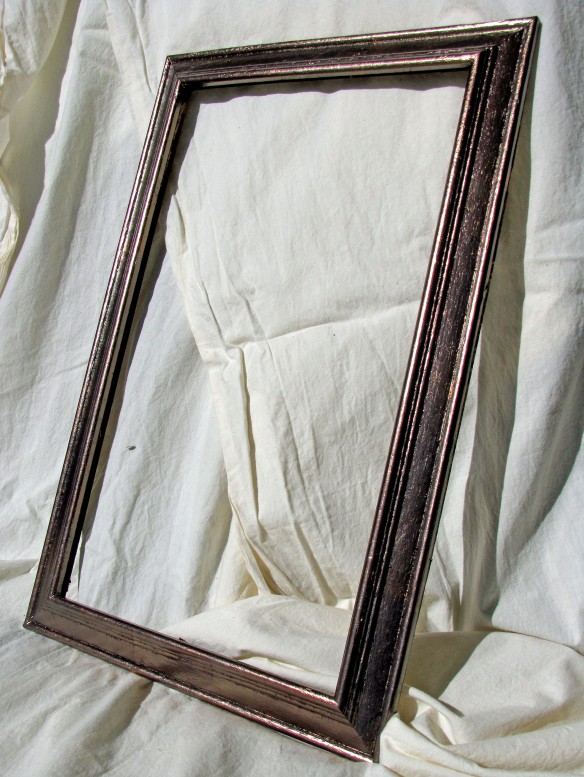
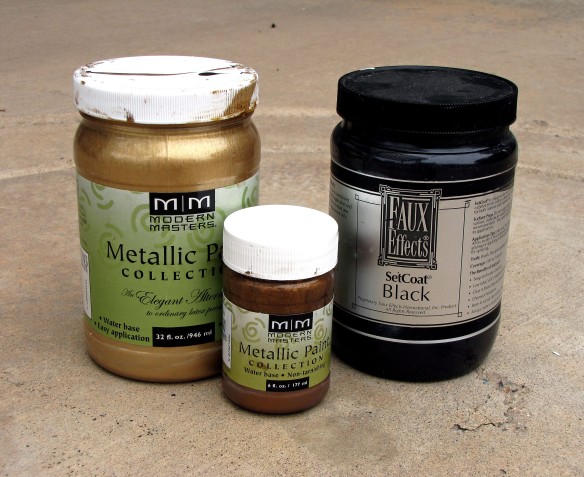
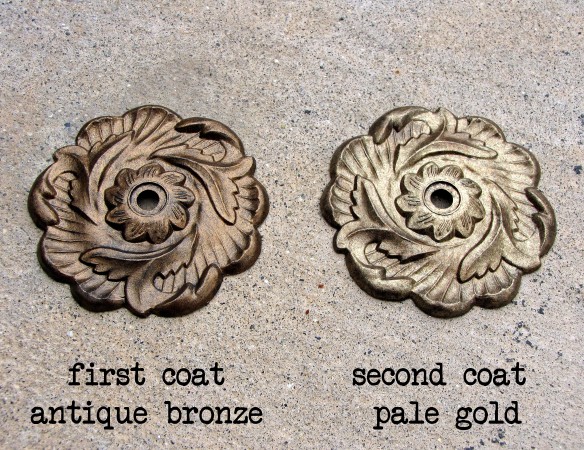
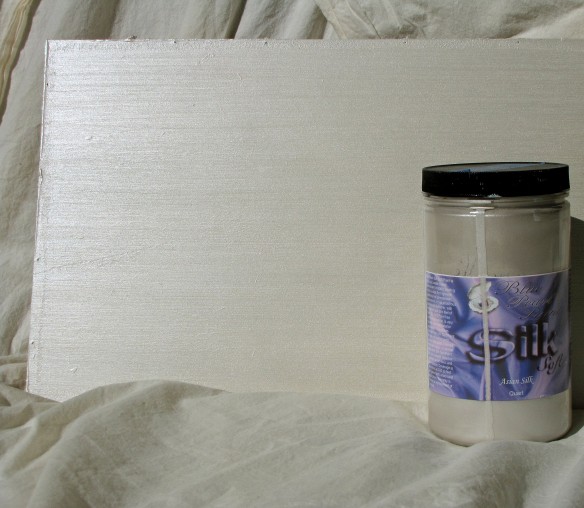
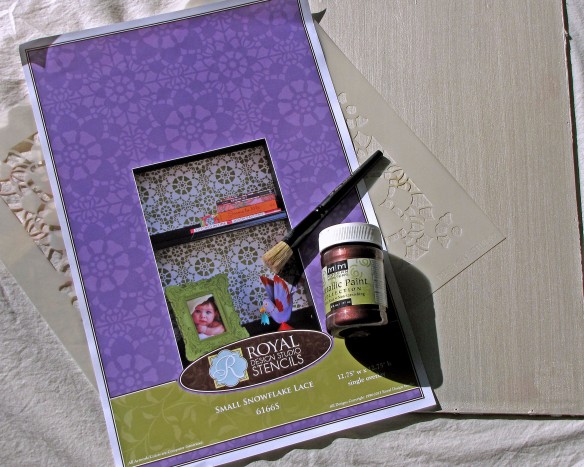
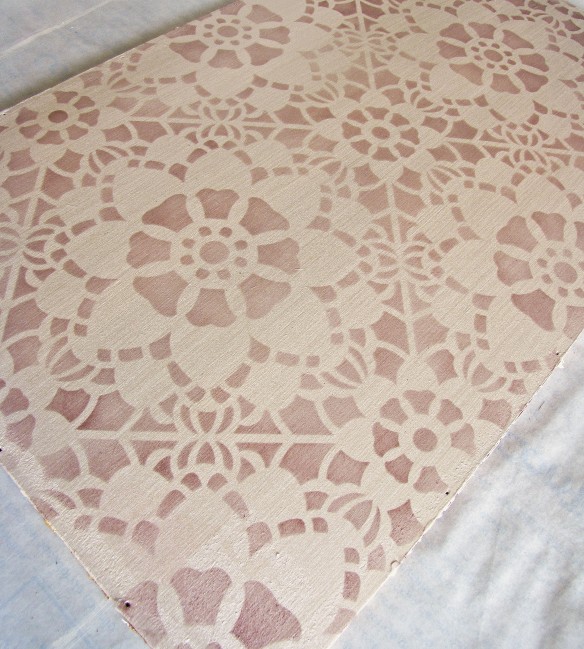
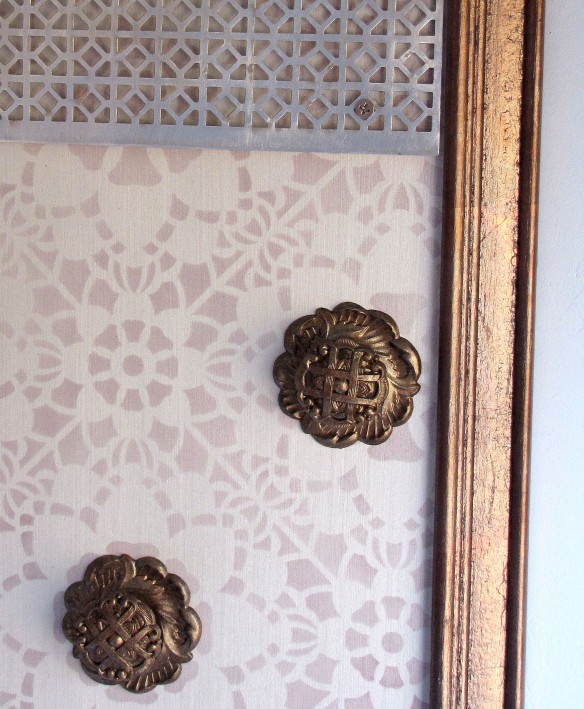
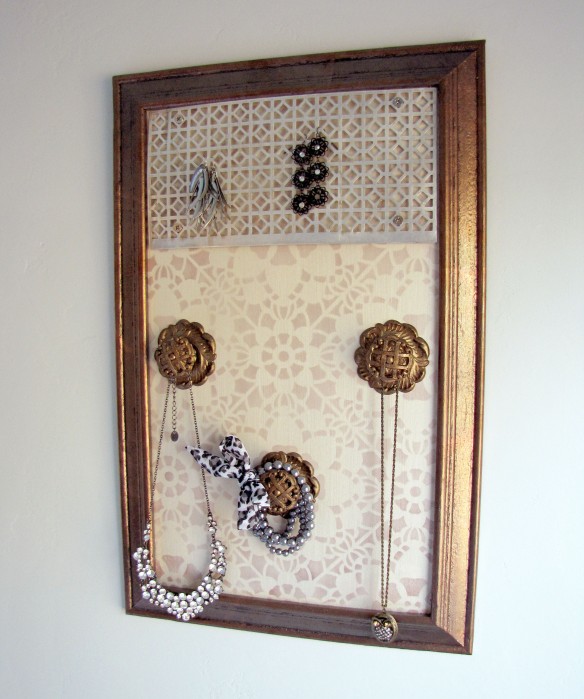
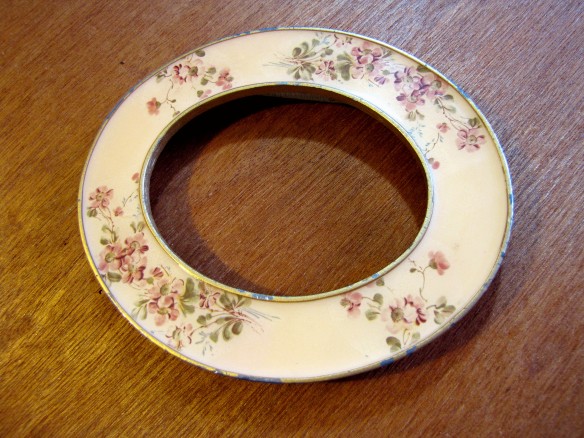
how to make a jewelry organizerHaving a teenage girl has definitely made me think more about jewelry than I have for a long time. I used to care about jewelry when I was still dating……a million years ago, but now I think my husband is just glad if I show up clean and not smelling of paint. To be completely honest, he’ll still take me out dirty and smelly but only because he doesn’t have many other offers……..not that I do. Anyway, back to the jewelry. I got an idea for a hanging jewelry organizer when I was rummaging through my junk and I thought I’d share the steps I went through to create it, just in case you have some junk laying around too…..oh, and some jewelry. In the above photo you can see what I started with. The frame and back board were originally together as a piece of “art” from Ross. The “art” was ugly so I pulled it out and used the back. I bought it at an estate liquidator place for $5, which is high (I think the guy thought it was “art” too) but he gave me two others for $1 so I’m telling myself I paid $2 for it. Ah, the rationalizations of the hoarder mind. The ugly metal knobs are in two pieces and I found them at a thrift store for 50 cents each.  I think the metal screen is used for radiators, but since we don’t have those in San Diego, that may be an urban legend. I found it in my friend’s garage and she let me take it for free. Yay! gilding size appliedI decided to gild the frame with metal leaf. The first step in gilding is applying gilding size and I always use Rolco Aquasize which is water-based and dries quickly. Gilding size is a watery adhesive that you brush on. The photo above shows the frame after the size was applied, which is why it’s shiny. The metal leaf I used is called Celestial Leaf and the color is Moonbeam. This is a variegated metal leaf, so the color is inconsistent, which I actually love. Celestial Leaf comes in books and each sheet is applied individually. metal leaf applied After the size has dried and become tacky, lay a piece of leaf on the surface and push it in to the crevices with a soft brush. Try to not touch the leaf with your bare hands as the oil from your hands can discolor the leaf. When you have the entire surface covered in leaf, smooth it out with a sheepskin pad. If you don’t have a sheepskin pad you can use a really soft rag, but just know that it may scratch the leaf if it’s not truly soft. frame gilded in Celestial leaf When the leaf is all shiny and pretty you can spray a coat of varnish on it to protect it from tarnish. I really recommend this step if it will be hung near a shower. Modern Masters and Faux Effects productsMoving on to the knobs….after cleaning them well, I primed them with Faux Effects Black SetCoat, but you could use any metal primer that works with water based paint. I painted them first with with one coat of Antique Bronze metallic paint from Modern Masters and then a second coat in Pale Gold. knobs painted in metallic paintMetallic paint can be fairly transparent which is why I used a black primer. I stippled (fancy word for blobbing on light layers of paint) a thin coat of each color with a small, badly, crumpled artist brush. Use a bad brush so that the pattern is irregular. Smooth brushes leave streaks if you just brush on metallic paint. You can get a better look by stabbing it on randomly, while allowing a little of the black primer peek through. Silk soft paint Now for the fun part; the backboard. I sanded the board to get rid of scratches but it was still a little uneven. I decided to hide the blemishes by using this Blue Pearl paint called Silk Soft, in the color Asian Silk. This is a metallic paint that actually has small fibers in it making it thicker and textured to the touch. To amplify this effect I applied it heavily with a rough chip brush in one direction. It looks very much like raw silk and it’s a great background for the next step. lace stencil from Royal Design StudioI used a new stencil from Royal Design Studio called Snowflake Lace. Royal Design just released a whole group of lace stencils that are really fun to use. I used Modern Masters metallic paint in Black Cherry and a brush from Royal Design Studio. Please don’t consider doing this with anything other than a stencil brush. Sponge brushes and artist brushes suck and should never be used for stenciling. You can use them, just don’t call me crying about it when it’s hideous. I told you not to use them. Dip your brush lightly in the paint, then rub off the excess paint in a swirling motion on a paper towel until there’s barely any paint on your brush. Swirl your brush lightly on the edges of the stencil openings, working your way into the center of each opening. Lift the stencil to check your progress as you go. It takes very little paint to leave an impression. beautiful job stencilingDo you see any blobs of paint? Any ooze under the stencil? No? That’s because I used a proper brush and a very light amount of paint.  It’s not rocket science. Just use the right brush for the project, and don’t go heavy with the paint. finished jewelry organizerWhen all the pieces were painted and pretty I put them together. The metal screen didn’t need to be painted, I just sanded off the dullness before attaching it to the backboard. The screen and the knobs were attached with bolts after I drilled holes in the board. necklace and ear ring holderSo from pieces of junk I created a great place to organize jewelry. I love how it all came together. It’s for sale in my Etsy shop now if you know anybody that could use a little help with corralling their accessories. This was so fun, I may have to make another one. Inventory used: Metallic paint

Stitched and Painted Bird Art

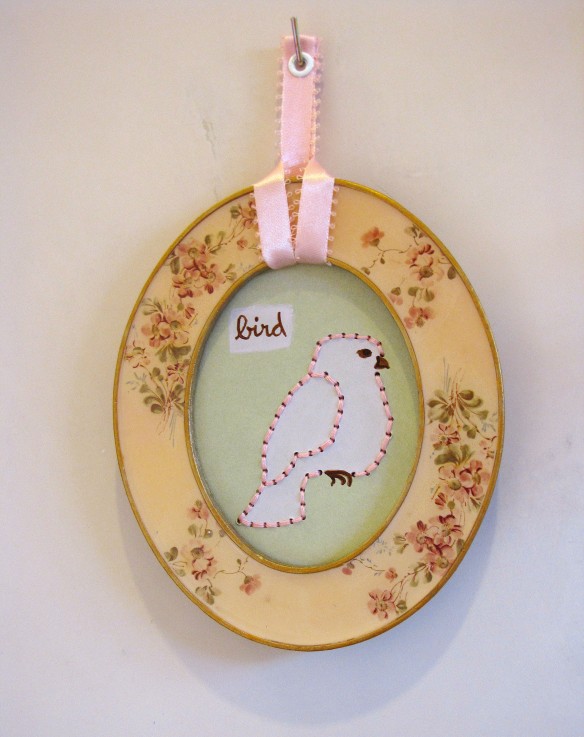
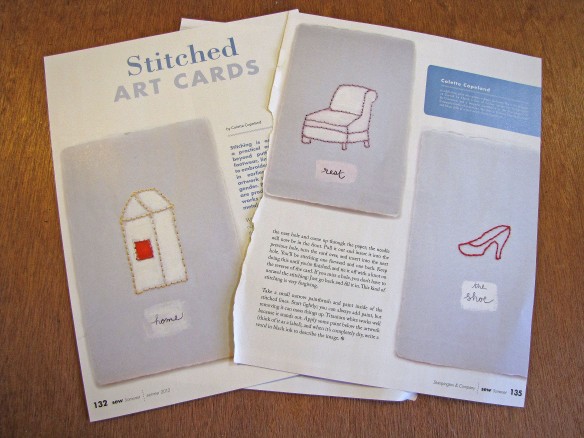
painted and stitched bird portraitI’ve been collecting all sorts of ideas for art gallery vignettes that I want to create in my home before we leave. The idea for this little beauty came from an article in Sew Somerset magazine that I pulled out over 18 months ago. I rip articles out that I like and keep them in binders in clear plastic pockets so that the rest of the magazine can be recycled. I recently confessed this behavior to a woman I chatted with at a bookstore. She said that I’m way too organized, but I think it sounds a little better than the hoarder house full of hundreds of magazines that she lives in. I don’t want to be found two weeks after I died, trapped under 10 year old craft magazines…….that would be so embarrassing.

Sew Somerset Summer 2012This article was written by Colette Copeland  who writes on a blog called a-bird-in-the-hand. I was taken in by the simple shapes, the single word, and the idea of outlining the image with hand stitching.

estate sale findI decided to use this frame that I picked up for 50 cents at an estate sale. The gold painted edges were dinged up and it had no back or glass, just a slot for a really thick image. I fixed the edges really easily with gold acrylic paint.

simple bird portraitSince the slot for the image was so deep I decided to paint it on a piece of an old book cover that was too broken to be used for anything else (Don’t ask me why I keep crap like that and don’t think I don’t know that you’re picturing me right now, dead under a stack of broken book covers, just stop it!). I sketched the outline first and then filled it in with watered down acrylic paint. When it was dry I poked holes with an awl all the way around the outline. I stitched the outline with pink embroidery floss using a backstitch.

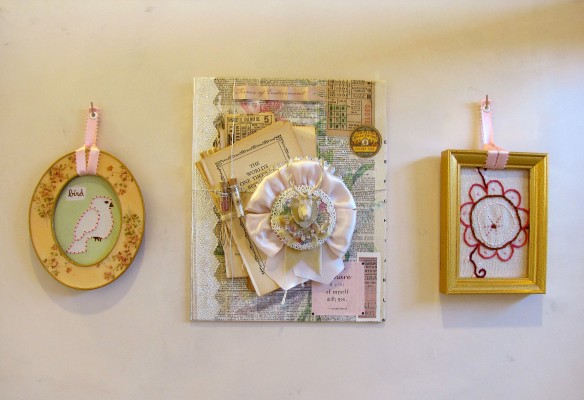
trio of handmade artI framed a doodle stitching piece (my first ever) in another gold frame I found at the same estate sale, and hung both of them with vintage pink ribbon. I put eyelets in the ribbon to make them easy to hang. They flank the collage piece that I made at the Spellbound Art retreat in November. I love this piece so much, but I had nothing else in this color scheme in my house, so I decided to make something to coordinate with it and that’s how this little grouping came about. I’m working on a bigger piece that I started at Spellbound for the opposite wall and I’m really excited about finishing it. I like these pieces because they’re so different from anything I’ve done before. I’m loving the freedom I have right now to try new things.

The three of them look great together, especially on the mottled, taupe, Venetian plaster in my guest bath. I did the plaster years ago and until now there hasn’t been any artwork in there. Mostly because Venetian plaster is hard to repair so I didn’t want to hang anything unless I was in love with it. There’s no poking holes, just willy-nilly when it comes to plaster, at least not in my house. The collage is light enough to be hung on a 3M adhesive hook but the two side pieces I hung on Monkey Hooks that only leave pin size holes, which shouldn’t be too hard to touch up………but only because I’m so awesome.

Inventory used: acrylic craft paint

Happy Birthday To Me

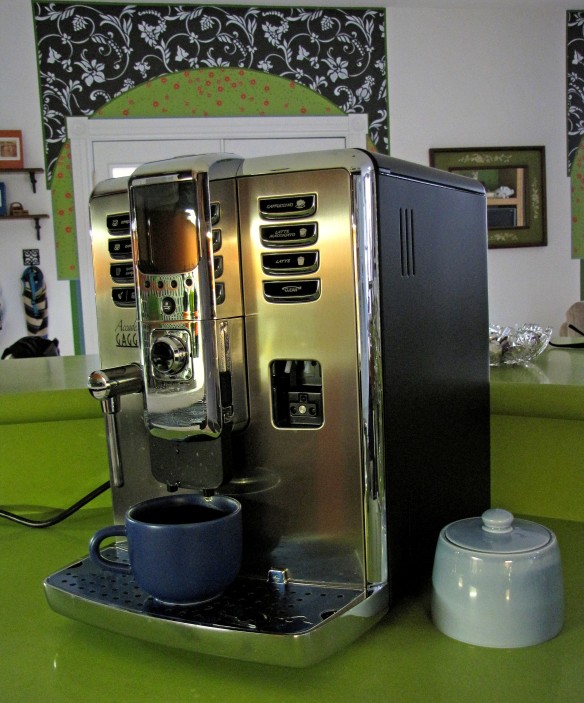
The Ultimate Espresso MachineNo, it’s not my birthday yet. It’s about two weeks away. Before we went to bed last night my husband said, “What if someone got you a birthday present that was so cool that you wish they had given it to you earlier, rather than make you wait for your birthday.” Suffice it to say, I gave him permission to give me his gift early and he told me he’d have it ready the next morning.

Sitting on the counter waiting for me today was the Gaggia Accademia espresso machine. I about peed my pants. This thing does everything but wipe the drool off your face when you’re standing there completely overcome by its awesomeness.

Gaggia Accademia coffeemaker

Can you even stand its awesomeness?!

To say that my little family likes coffee is a huge understatement. We’ve been through way too many machines over the years, looking for the perfect maker. I think the real problem is that my husband and I have both spent a considerable amount of time in Italy which caused us to be seriously disappointed in every cup we’ve had in America since then. Even my daughter who has traveled quite a bit can tell you that the best cappuccino she ever had was at a flea market in Paris. Totally spoiled, I know, but she really is a very nice girl, and if it makes you feel better, she is short, which I’m sure is payback for that perfect cappuccino when she was 13.

So here I sit, with a big stupid grin on my face, an empty cup beside me, trying to type with hands that are so jittery that my spellcheck feature has abandoned me, and all I can think about is that even in this day and age, it’s so important for girls to marry well. (thanks, Hon, you’re the best!)

Mixed Media Collage

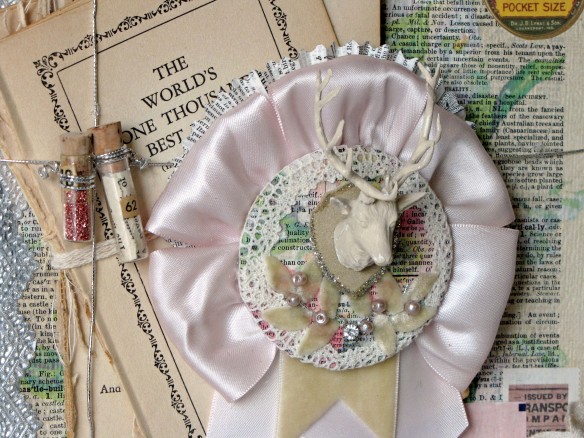
Terms of EndeermentTwo months ago I attended the Spellbound Event in Pasadena and it was the funnest thing I’ve done in a long time. Spellbound is an art retreat hosted by A Gilded Life and I’m definitely planning on going again this year. The collage above is from the first class I took at the retreat. The class was called “Terms of Endeerment” and was taught by Cathe Holden. I picked this class mostly because of the deer head. It’s awesome.
Rosette corsageCathe was a fantastic teacher and although there were a lot of layers in this project she broke it down and made it seem easy. Cathee has a book out called Rosette Art, so I guess you could call her a rosette expert.
I never did sports growing up so I don’t have any ribbons hanging on my wall or stuffed in boxes. I think this one’s prettier than all the hundreds my sister got for gymnastics. No, I’m not bitter, just lazy and prone to fainting spells when I sweat.

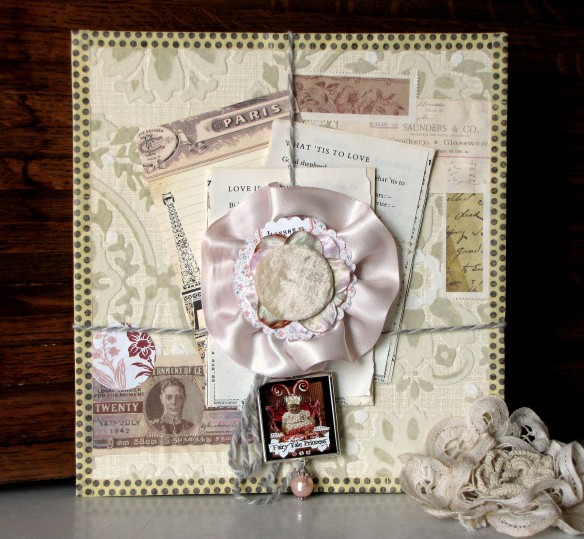
I loved how this piece came out, but when my daughter’s friend saw it in my studio, she really, really loved it. Now normally, I’m generous with my stuff, but like I said, I love how this piece came out, so it’s not leaving my studio anytime soon. I decided to make her something similar. It makes me look generous without having to give up any of my own stuff.

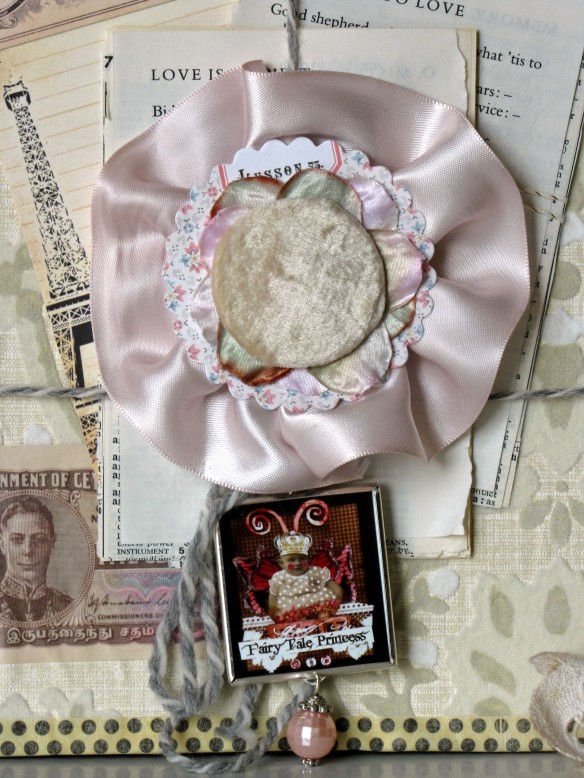
rosette art collageI made the background out of a foam core board that I plastered with a scrap of flocked wallpaper. (I love flocked wallpaper!) I made the rosette from a fabric covered button that I recovered with velvet. I got the pendant at the bottom from Michael’s, but the rest of it came from the stash drawers in my studio.

velvet rosette collageI think it’s a close enough reproduction to make her happy. It definitely says something for Cathe Holden’s ability to teach that I was able to duplicate it without her help two months later. Taking classes opens you up to to new ideas, tools and techniques, and I waited way too long to take one again. I’m so glad I got the chance to take this class, and in turn make something cool for a really deserving girl that could use a little frivolous beauty in her life. Everybody wins.

A Peaceful Bedroom

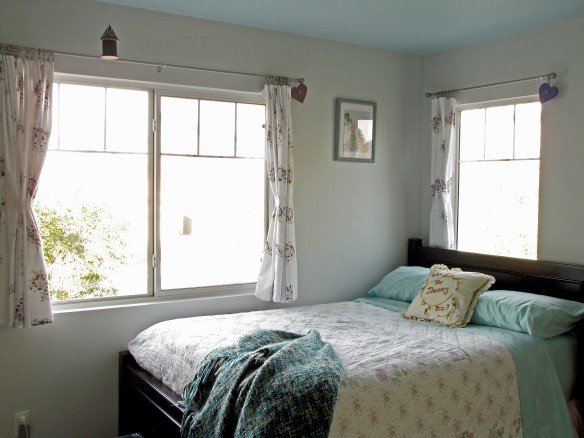
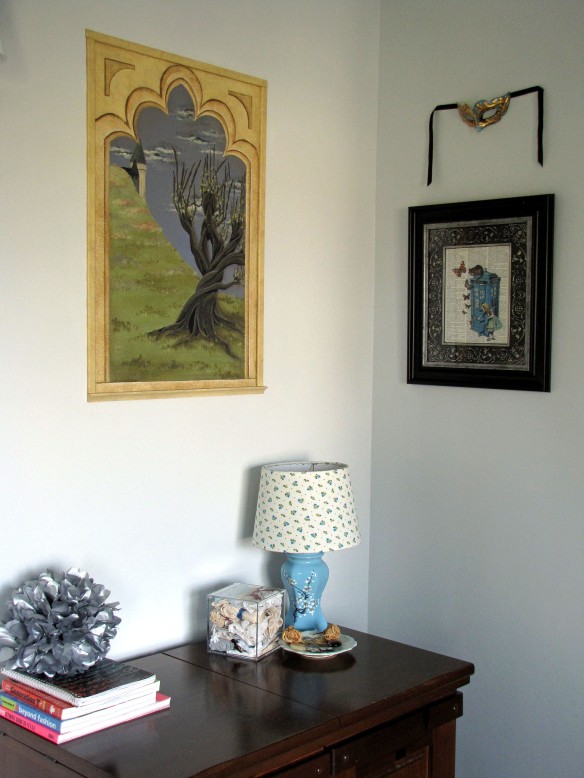
grey and lavenderMy daughter chose a color palette of powder grey, lavender and sky blue for her bedroom’s last makeover. As I mentioned earlier, this would be the fourth makeover since she was five. She’s nearly 18 now and wanted to make her surroundings peaceful and serene. The challenge in redoing this room was that the third makeover had made the walls extremely difficult to paint.

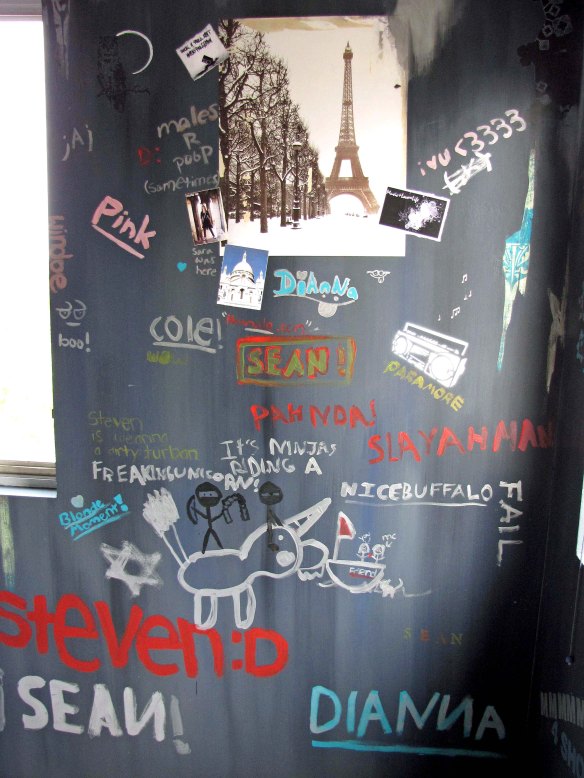
the writing on the wallThis was what I had to cover up. I had at least been smart in that only water-based products had been used on the walls. I had even found water-based Sharpie paint markers so that the writing wouldn’t bleed through the next layer. The biggest problem was covering up the paper images. Apparently, I really glued those things down. So rather than try to remove them, I decided to plaster over them. I have several gallons of various plaster products in my Stash and this was a great opportunity to use them. I’m not going to tell you what I used because they can’t be bought by the general public, and I didn’t use them the way they were supposed to be used and I really don’t want to give you people any ideas.

plaster over sheet musicThis is what I call “artistic experimentation.” I troweled on different products until I found one that gave me the look that I wanted. I ended up giving the walls a skip-troweled finish which I love. It took me a week to get the walls plastered and even. Once it was sanded and level we finally got to paint.

Whomping Willow muralMy daughter is still not ready to let go of the Whomping Willow mural I painted two makeovers ago. It originally looked like this:

Hogwarts mural

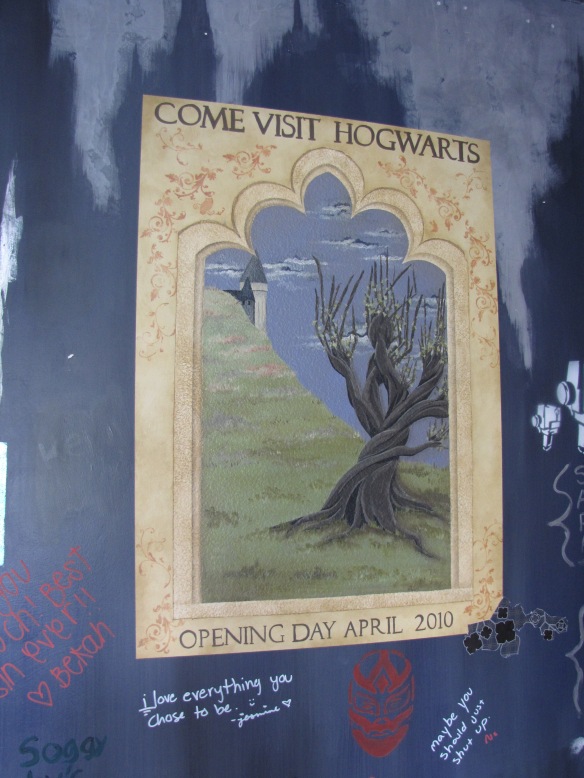
Then I transformed it to this:

Harry Potter posterThe idea was to make the mural look like an advertising poster for the Harry Potter exhibit opening at Universal Studios in 2010. One mistake I made was stamping those designs in the corners. I didn’t think about what the ink was made of and when I tried to plaster and paint over them, the ink kept bleeding through. It took about 5 coats, no kidding.

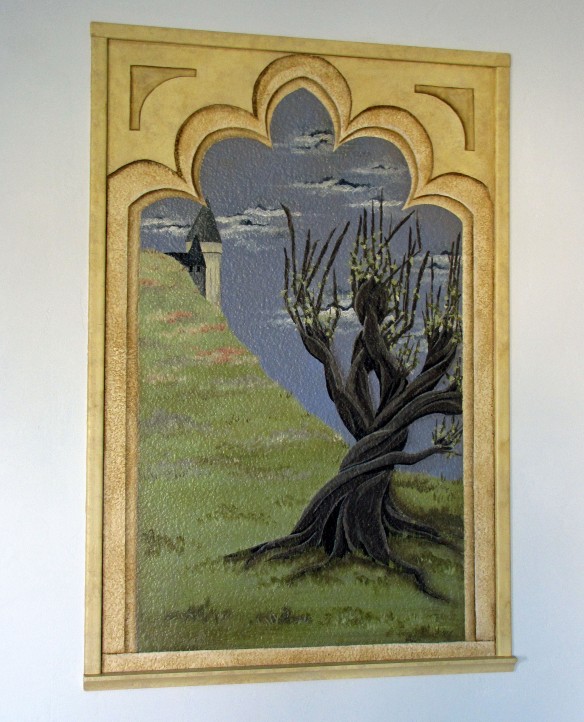
trompe l'oeil muralI didn’t like the raw plaster edges around the mural so I ended up cutting wood trim and attaching it to the edges. The bottom piece of trim actually has a small lip like a ledge. I faux finished the trim to match the mural, added some trompe l’oeil details to the top corners and lightened up the color of the frame so that it complements the wall color better. I’m really happy with how it came out.

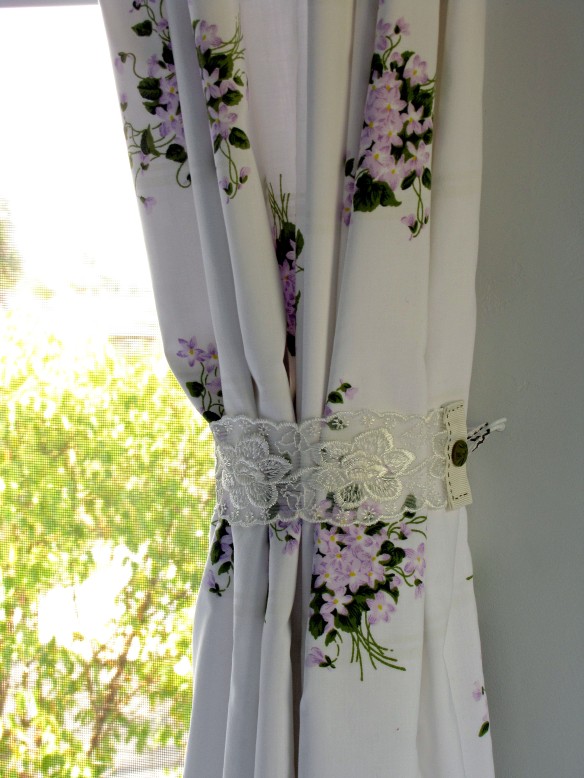
thrift store fabric curtainsWe really lucked out on the day we went shopping for curtain fabric. We went to our local DAV thrift store and these sheets were just sitting there, along with a lavender sheet that I used as a dust ruffle.The curtains were cut from one twin size sheet and one queen size. I lined them with two plain white sheets to block out more light. I think I spent less than $20 on all the fabric. The rods and rings are from Target. I made the tie backs from lace, ribbon and fabric snaps out of my sewing stash. I absolutely love how these look on the windows.

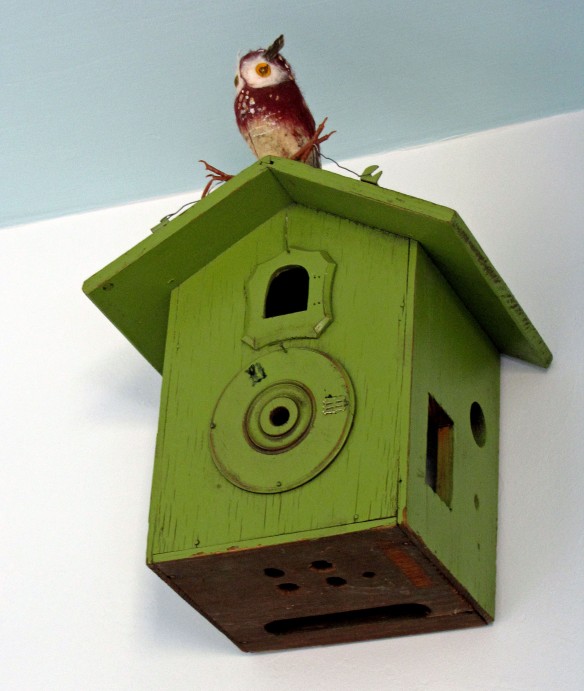
wood birdhouseMy daughter got rid of a lot of stuff so that the walls would be sparsely decorated and less busy. This is the first room in the entire house that I haven’t added pattern to the walls in one form or another. It’s a new experience, but I think I love it.

Inventory used: 1 gallon faux stone


2014-Looking Forward To It

mammoth sunflower

I didn’t want to be like all the other bloggers out there; oozing hope and sunshine, bright and early on New Year’s Day. I wanted to catch you a few days into the new year, after the gloss had worn off just a bit. (Okay, so truthfully, I got blown off course by a family crisis on Christmas Eve and am just now getting back on track)

2014 is going to be a year full of changes with my daughter graduating from high school in June, putting our house up for sale in the summer and all of us moving from the suburbs of Chula Vista to city life in San Diego.

This blog began 18 months ago with a self-imposed challenge to get rid of my paint stash before we move this coming summer. So as of right now, I have about 6 1/2 months to get rid of the rest of my stash. I’ve looked at the the projects left to do around my house and have come to realize that I’m never going to use up all these products. The challenge – as I wrote it – allows for four ways to reduce my stash. I can use it up, trade it, sell it or donate it. Right now I’m keen on donating it, however, the products that are taking up the most space are specialty, faux finishing products that the general public doesn’t know how to use. So I’ve decided to host a paint-and-play day for my painter friends. We’ll open everything up and see if they can lighten my load, and have a little fun getting messy.

Even though I’m planning on giving away the majority of my paint, I’ll still have plenty of paint projects to post, I promise. I’ll be trying to destash the other materials in my studio as well, so there will also by fabric and crafting posts just to keep it interesting.

Salvaged Sanity did well over the holidays and as a result, the shop is looking kind of empty. I’ve got some new ideas for creative storage products using secondhand stuff that I just can’t wait to make. Of course that will involve a few treasure hunts through estate sales and flea markets and I hope you’ll come along for the ride.

The Hardest People to Shop For – aka, my family

My immediate family is very small, so leaving home yesterday with the intention of doing all my Christmas shopping in one day was not outside the realm of possibility. I got my Starbucks on and good music in my car and shuttled myself up to one of San Diego’s major malls. (For all you people who like to guilt people for shopping in malls: I already did my small business and Etsy shopping last week and have made 50% of my gifts, so back off)

I’ll let you know ahead of time that I did achieve my goal, but about two thirds of the way through my day I started to get the panic that only comes from shopping for my family. I’ve put off telling you my family’s ugly little secret, but I think I need a little support from all the normal people out there so here goes…….

Two out of the three people in my family suffer from Urticaria….there, I said it. Wikipedia defines it this way:

Urticaria (from the Latin urtica, nettle,[1]) commonly referred to as hives, is a kind of skin rash notable for pale red, raised, itchy bumps. Hives might also cause a burning or stinging sensation. Chronic urticaria (hives lasting longer than six weeks) is rarely due to an allergy. Less common causes of hives include friction, pressure, temperature extremes, exercise, and sunlight.

Okay, so now you’re sitting there saying, “What do you mean they get hives from pressure and friction?” To state it simply, they break out from seams in clothing, uneven fabric, carved details, ridges, bumps, dirt, sand, dust, basically from being alive. My husband has had it all his life and I had high hopes that my daughter wouldn’t develop it, but this year she went from sensitive skin to insane requirements for anything that may touch her. Awesome.

Now back to shopping…..remember, the panic was setting in. I had ideas for what I was shopping for (which I won’t tell you because that would ruin the surprise), but having not been out in public lately, I was unaware that this year’s styles are an urticaria sufferers worst night mare.

I’m not even going to get into the zippers and the studs, which are ridiculous, what mostly caused the panic was the texture of the sweater itself. My daughter would get a rash from just looking at these…….and that’s all they’re selling this year.

About halfway through my trip I started laughing because if any security person was watching the manner in which I shopped, they would think I was blind. I manhandle every single item I consider, for way too long. Even in Sur la Table I was fondling the handles of utensils for over 20 minutes. You have no idea how many items were not purchased because they had ridges, or fibers, or were designed in such a way that it would rub a neck, a finger or wrist which could possibly result in hives.

And here’s the kicker, as much time as I spent trying to find these perfectly smooth items, they will probably end up returning half of what I bought because of a seam or ridge that I missed. Let’s just say that I put a definite dent in the box of wine when I got home, which I drank it out of my special bumpy, carved glass as a sort of F U to the Urticaria Gods. Take that!

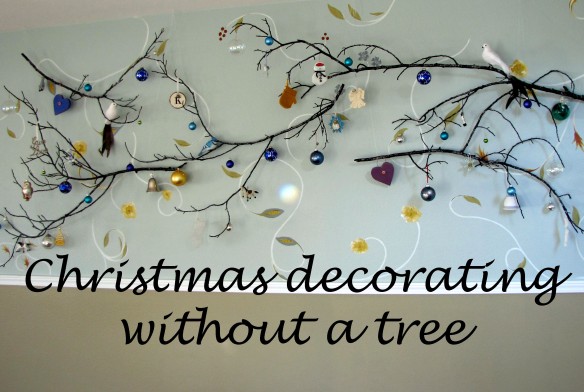
Christmas Decorating without a Tree

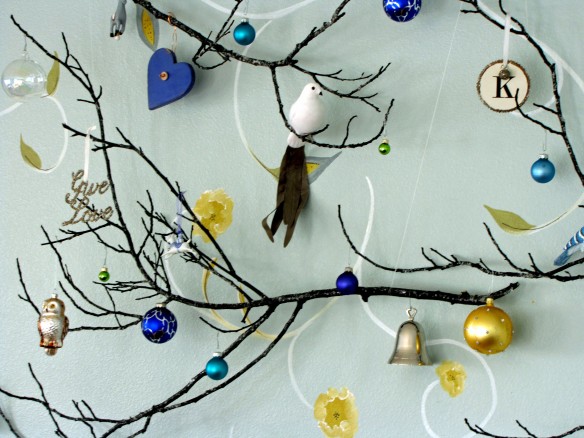
Christmas focus wallI will admit that Christmas is not my favorite holiday. I don’t like spending endless amounts of money, or overeating and it seems senseless to buy decorations that sit in a box 11 months out of every year. I know you could say the same thing about Halloween, but Halloween is fun. There’s just so much guilt wrapped around Christmas. Did you spend too much? Not enough? Did you cook it right? Cook enough? Are you making it memorable? Are your kids disappointed? Spoiled? Ungrateful? The list goes on and on, mostly in my head, but it weighs so heavily on my heart as well.

I combat these feelings with making a lot of the gifts I give and the decorations we put up. For the past few years I’ve had an argument inside about the Christmas tree. I really don’t like putting them up. We had an ugly, fake one for a long time. We bought it because it was ugly. It made me feel like I was thrusting my middle finger at The Christmas Police. “You want me to have a tree? Here! Here’s your freaking tree!” A couple years ago it became too ugly, even for me. Ever since, I’ve had to figure out some way of putting up my ornaments, without buying a tree. This year’s solution is my absolute favorite because it was free and it used up four spray paint cans out of my stash.

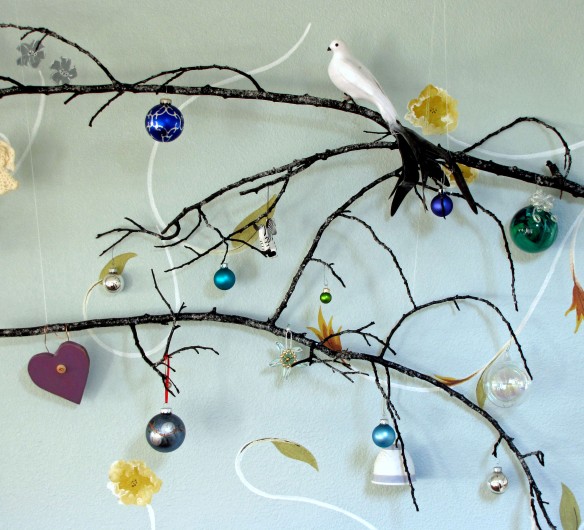
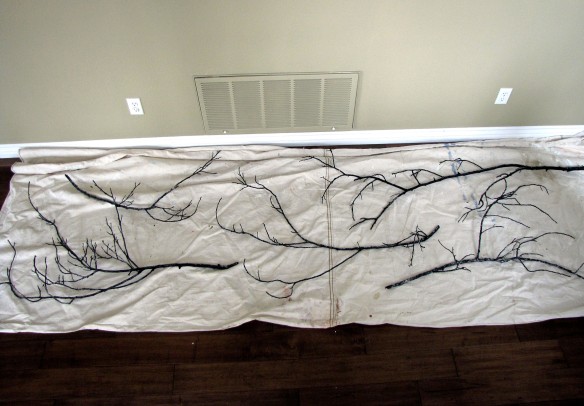
branches painted blackI brought home five branches that I found on the ground at the park next to my house. I painted them first with black floral spray paint to make them stand out a little more since my wall is a little busy. To make it look like they had snow on them I sprayed them a few inches at a time with clear topcoat spray and while they were wet I sprinkled them with small mica flakes and then I coated them really well with more topcoat to get the flakes to stick. I had the flakes on hand from when I used to make countertops. (I didn’t want to use glitter because I was afraid my dog might eat it and get sick)

mica snowmy kind of ChristmasTo hang them I put four small eye hooks in the ceiling about 3 inches from the wall and about two feet apart.  I tied thread in two places on each branch and suspended them at different heights.

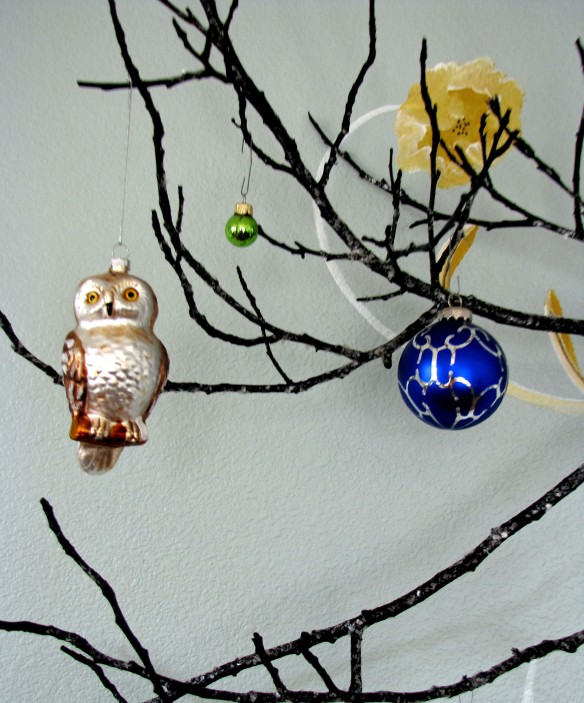
Christmas branchesOrnaments on highI love the way it really shows off our ornaments. Plus, unlike a tree, there’s no bad side, no broken lights and no need to water it. Way better than a tree, at least for me. Please don’t get me wrong, I think Christmas trees are beautiful and I love all the lights, I just hate doing it. My hats are off to all you Christmas tree decorators out there. I admire your tenacity. You’re a better man than me.