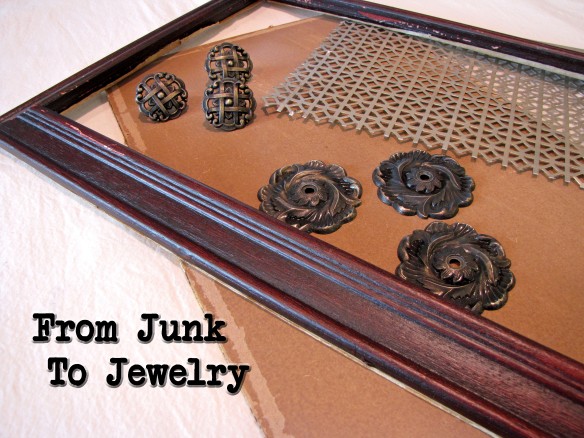
 Having a teenage girl has definitely made me think more about jewelry than I have for a long time. I used to care about jewelry when I was still dating……a million years ago, but now I think my husband is just glad if I show up clean and not smelling of paint. To be completely honest, he’ll still take me out dirty and smelly but only because he doesn’t have many other offers……..not that I do. Anyway, back to the jewelry. I got an idea for a hanging jewelry organizer when I was rummaging through my junk and I thought I’d share the steps I went through to create it, just in case you have some junk laying around too…..oh, and some jewelry. In the above photo you can see what I started with. The frame and back board were originally together as a piece of “art” from Ross. The “art” was ugly so I pulled it out and used the back. I bought it at an estate liquidator place for $5, which is high (I think the guy thought it was “art” too) but he gave me two others for $1 so I’m telling myself I paid $2 for it. Ah, the rationalizations of the hoarder mind. The ugly metal knobs are in two pieces and I found them at a thrift store for 50 cents each. I think the metal screen is used for radiators, but since we don’t have those in San Diego, that may be an urban legend. I found it in my friend’s garage and she let me take it for free. Yay!
 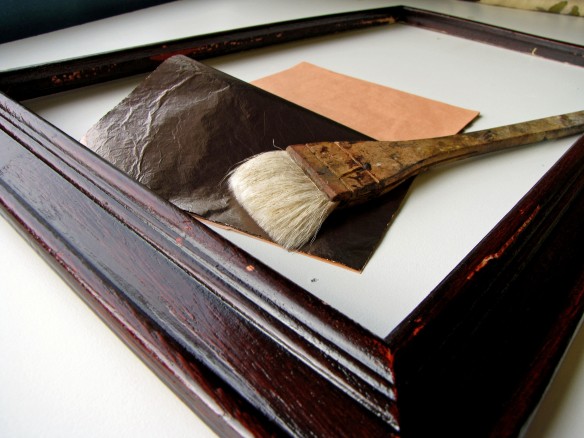 I decided to gild the frame with metal leaf. The first step in gilding is applying gilding size and I always use Rolco Aquasize which is water-based and dries quickly. Gilding size is a watery adhesive that you brush on. The photo above shows the frame after the size was applied, which is why it’s shiny. The metal leaf I used is called Celestial Leaf and the color is Moonbeam. This is a variegated metal leaf, so the color is inconsistent, which I actually love. Celestial Leaf comes in books and each sheet is applied individually.
 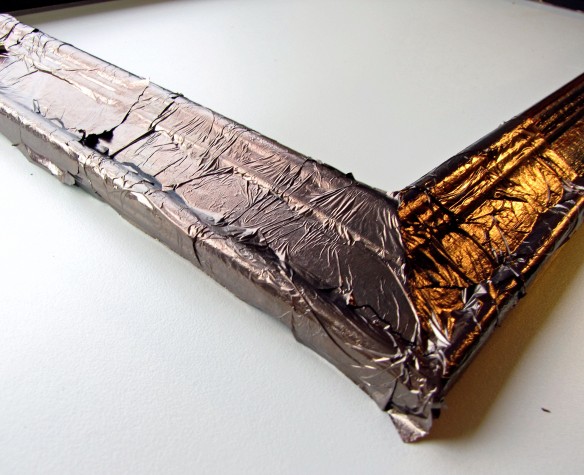 After the size has dried and become tacky, lay a piece of leaf on the surface and push it in to the crevices with a soft brush. Try to not touch the leaf with your bare hands as the oil from your hands can discolor the leaf. When you have the entire surface covered in leaf, smooth it out with a sheepskin pad. If you don’t have a sheepskin pad you can use a really soft rag, but just know that it may scratch the leaf if it’s not truly soft.
 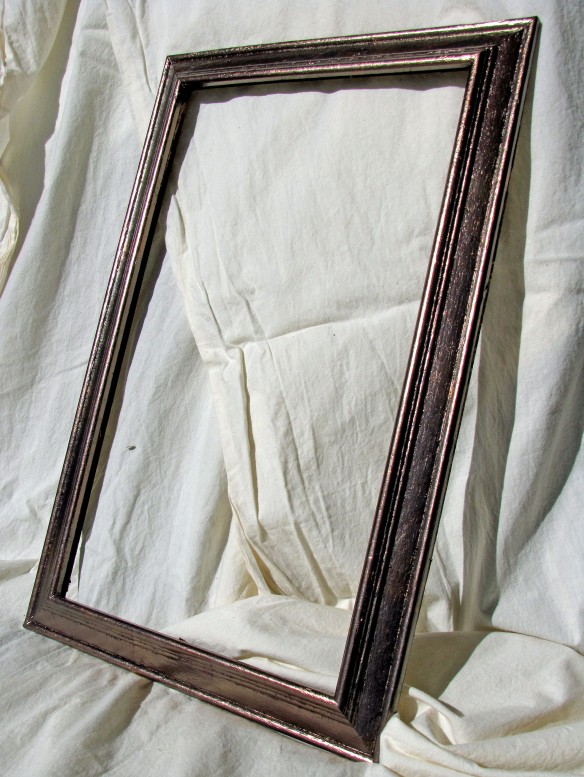 When the leaf is all shiny and pretty you can spray a coat of varnish on it to protect it from tarnish. I really recommend this step if it will be hung near a shower.
 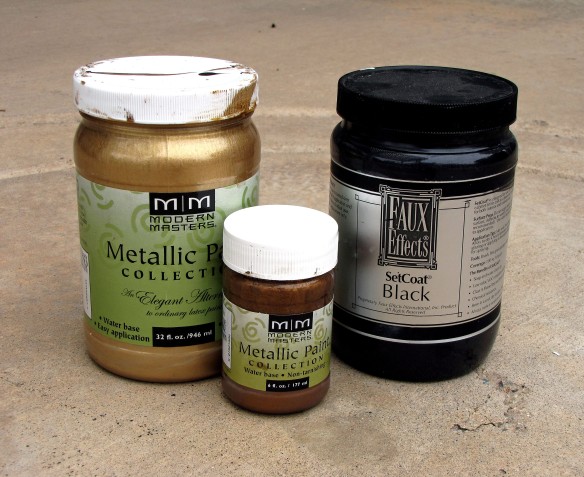 Moving on to the knobs….after cleaning them well, I primed them with Faux Effects Black SetCoat, but you could use any metal primer that works with water based paint. I painted them first with with one coat of Antique Bronze metallic paint from Modern Masters and then a second coat in Pale Gold.
 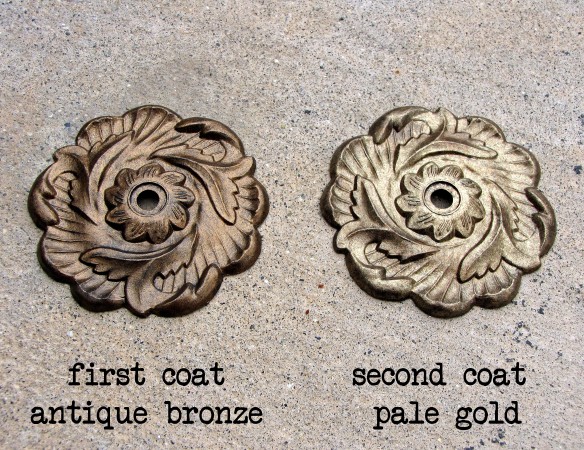 Metallic paint can be fairly transparent which is why I used a black primer. I stippled (fancy word for blobbing on light layers of paint) a thin coat of each color with a small, badly, crumpled artist brush. Use a bad brush so that the pattern is irregular. Smooth brushes leave streaks if you just brush on metallic paint. You can get a better look by stabbing it on randomly, while allowing a little of the black primer peek through.
 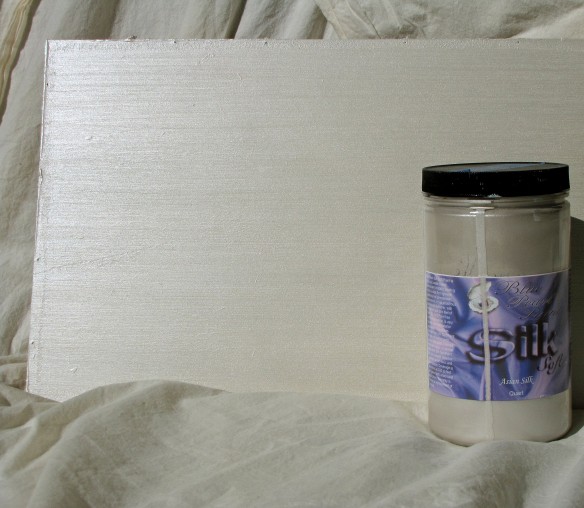 Now for the fun part; the backboard. I sanded the board to get rid of scratches but it was still a little uneven. I decided to hide the blemishes by using this Blue Pearl paint called Silk Soft, in the color Asian Silk. This is a metallic paint that actually has small fibers in it making it thicker and textured to the touch. To amplify this effect I applied it heavily with a rough chip brush in one direction. It looks very much like raw silk and it’s a great background for the next step.
 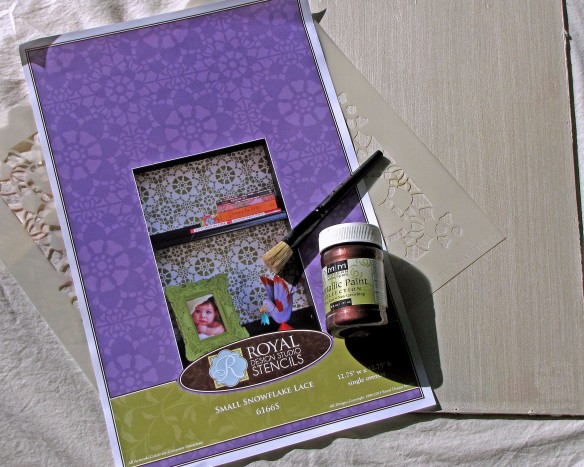 I used a new stencil from Royal Design Studio called Snowflake Lace. Royal Design just released a whole group of lace stencils that are really fun to use. I used Modern Masters metallic paint in Black Cherry and a brush from Royal Design Studio. Please don’t consider doing this with anything other than a stencil brush. Sponge brushes and artist brushes suck and should never be used for stenciling. You can use them, just don’t call me crying about it when it’s hideous. I told you not to use them. Dip your brush lightly in the paint, then rub off the excess paint in a swirling motion on a paper towel until there’s barely any paint on your brush. Swirl your brush lightly on the edges of the stencil openings, working your way into the center of each opening. Lift the stencil to check your progress as you go. It takes very little paint to leave an impression.
 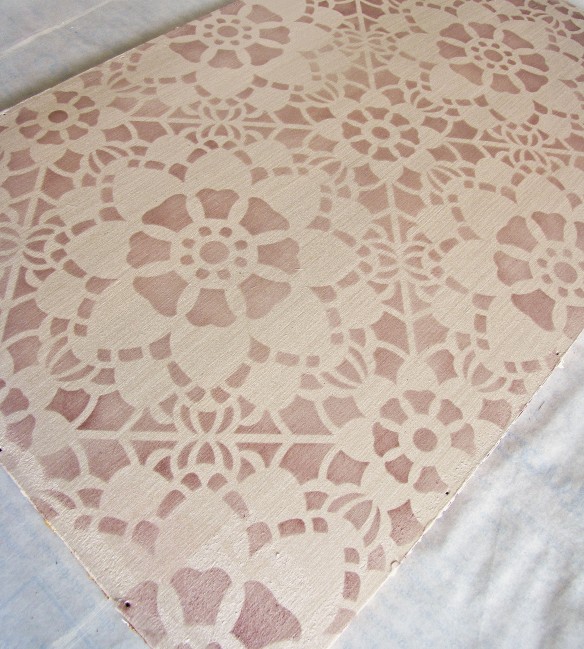 Do you see any blobs of paint? Any ooze under the stencil? No? That’s because I used a proper brush and a very light amount of paint. It’s not rocket science. Just use the right brush for the project, and don’t go heavy with the paint.
 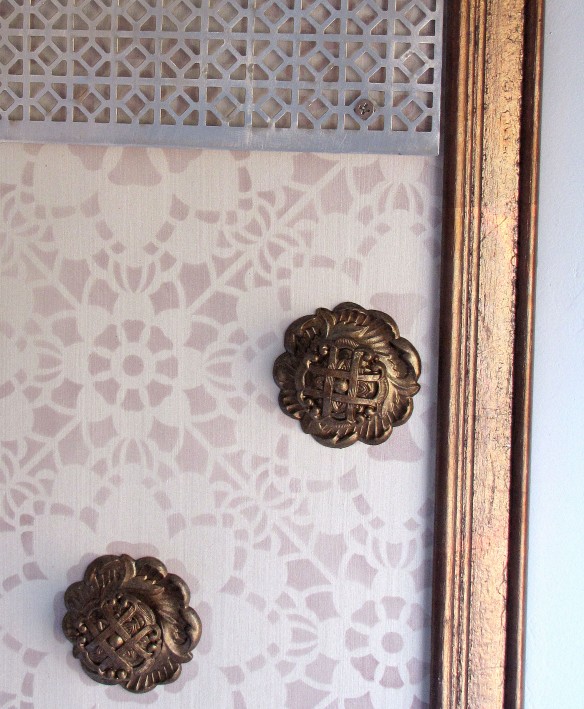 When all the pieces were painted and pretty I put them together. The metal screen didn’t need to be painted, I just sanded off the dullness before attaching it to the backboard. The screen and the knobs were attached with bolts after I drilled holes in the board.
 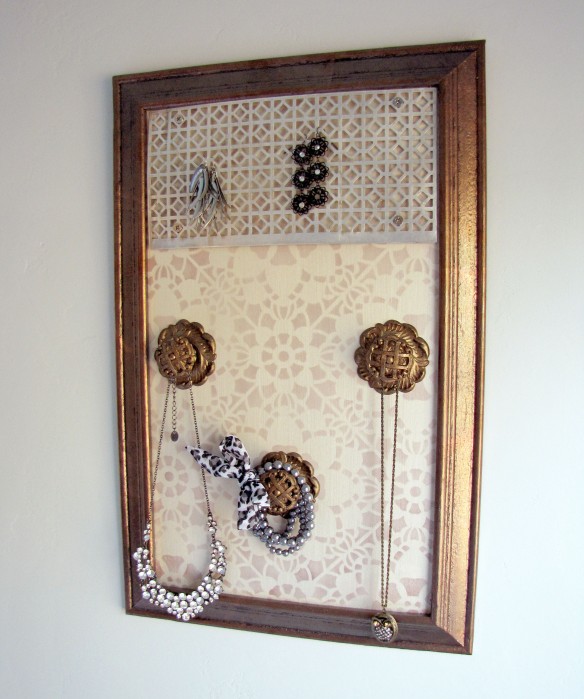 So from pieces of junk I created a great place to organize jewelry. I love how it all came together. It’s for sale in my Etsy shop now if you know anybody that could use a little help with corralling their accessories. This was so fun, I may have to make another one. Inventory used: Metallic paint
Tag Archives: Etsy shop
New Organization Tools
September is one of those months that I get really motivated. September and January I end up doing Spring Cleaning, which I know doesn’t make any sense, but there it is. I recently made a few new message centers that I’m particularly proud of. They go along with my seasonal organization disorder.
 This dark one has what I call a Forever calendar at the top. I’ve also heard them called perpetual calendar. The idea is, you write in the dates for each month with a dry erase marker. I left room around the edges so you have room to write other notes as well. I stenciled a calendar grid on canvas and hand painted the corners in grey and dark mustard colors. I installed it under glass in an old frame I picked up at an estate sale.
 This organizer is pretty basic. It’s a calendar with IN and OUT file holders below. All the salvaged wood moldings are stained the same in a dark walnut finish.

 The vintage books I used are big enough to hold standard size file folders. The color palette is different but I think it works.
 The other two boards I built are being sold as a set. The thing is, I had a bunch of pieces that I wanted together and I thought it would be too wide, so I split the board up. This gives the owner the flexibility to either hang them side by side or vertically, or in two completely different places.
This first one has a large book that can hold file folders. Beneath it is a magnet board covered in a vintage fabric and sports two magnets made out of antique looking bottle caps. On either side of this are two clothespins attached to the board to hold invitations and reminders.
 This message board has a dry erase board with vintage tablecloth fabric under the glass. There’s a tin for holding pens and pencils right where you need them. Under that is a small mail holder and a hanging frame.
Both boards are painted in high gloss white which is different for me, but I really like how it looks. All of these can be viewed in more detail at my Etsy Shop. Have a great holiday weekend.
Inventory used: latex paint, Stain & Seal
My Weekend at Comic-Con
 I have been more than up front with my “Walking Dead” addiction, so it will be no surprise to you that Saturday night found my daughter and me with tickets to the Walking Dead Escape, zombie run. CRAZY!
Comic-Con was this past weekend in San Diego (for those of you that live under a rock) and downtown San Diego was Heaven for geeks for four fabulous days. Before this weekend I’ve only been close enough to see people walking around downtown in fantastic costumes. This year we were blessed with free passes for Sunday. We couldn’t wait for Sunday to come, so we decided to pay to have zombies chase us until our legs gave out. It was awesome.
 This is what greeted us. So wicked cool.
Zombies don’t care if you’re an adorable child……you’re just a Kid’s Meal to them.
There are three ways to get in to the Walking Dead Escape. You can buy a spectator ticket and watch people like me make complete asses of themselves. You can buy a zombie ticket and the Walking Dead people give you a makeover like this.
 Or you can buy a survivor ticket and try to get through the course without getting infected with the zombie virus. We bought Survivor tickets……..and no…..I didn’t survive. But I did get to run like a little girl with this guy:
 Patrick Warburton, the actor who played David Puddy in Seinfeld, ran in the same group as us. He was with his family. The Walking Dead Escape is a great family friendly activity. I know it brought me and my daughter closer. Nothing like the flesh eating undead to bring you closer to your teenage daughter. mmmmmmm tasty.
After we recuperated from our brush with death we ran into this guy:
 This is Matt Smith, the current Doctor from Dr. Who and he was ducking in to the Hard Rock Hotel and my daughter burst in to tears from being within touching distance of him. Crazy! Great moment.
Then we ran in to this guy:
 Monroe, from the show Grimm (our Friday night favorite) walked right past us, totally staring at my daughter, who then remembered that she still had “blood” on her forehead from being shot by a doctor to prevent her from turning in to a zombie. It sucks being a zombie. Although if anyone knows about turning into a hellish creature, it would be Monroe.
 Inside Comic-Con the next day was great. Geek Paradise. We had to kill a couple zombies outside the prison……..just defending my right to rampant profanity.
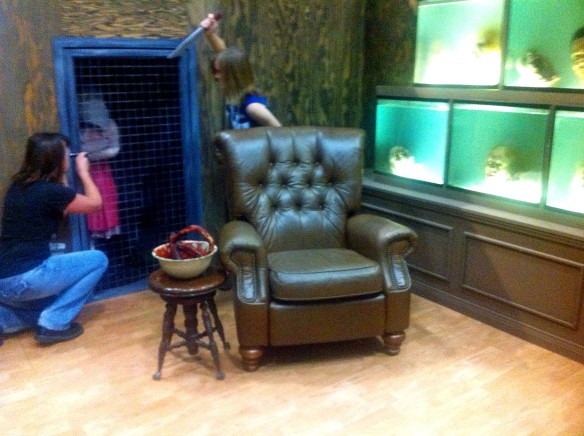 We tried to kill this adorable young zombie just outside The Wall of Heads, but we couldn’t get her out. Dang. (These are all Walking Dead references. If you want to keep up, rent the series through Netflix. You’ll thank me.)
The rest of the day was just full of over-the-top costumes, fantastic artwork and so many people in one place that I’m thankful no one screamed “fire” or “Oh my God, it’s Captain Kirk!” The stampede would’ve been ugly. So glad I got the chance to go. Big thank you to my fairy godmother, Eric. Love you, Man!
Don’t forget that the XMAS in July sale is still going on at both the Destashio Etsy shop and the Salvaged Sanity Etsy shop. Eight days left to get 20% off. Just use Coupon Code: XMAS20 to get the discount.
The New Assmaster 2000 is Here!
 Today we welcomed a new addition to our family……a brand new Assmaster 2000. This will be our second Assmaster. We’re still happy with our first one that’s in the guest bath, that is, except for it’s tendency to rip the skin off your thighs if you stand too close when you’re flushing it. It’s better than liposuction.
The unplanned bathroom renovation is moving along at a fairly steady pace, regardless of my wishing I was doing something else. The paint is done on the walls and the cabinets. The new floor is down and I’m happy with it……..happy that I’m done with it! The baseboards are painted and I’ll put those in tomorrow. The counter top turned out beautifully and we’ve figured out the backsplash today so that will get done tomorrow…or the next day. I sanded and refinished the light fixture and it looks cool and modern rather than rusted and cheap. So, it’s moving along, but there’s still a lot on the list if we’re going to complete it before my daughter starts back to school……..in 6 days. No pressure!
 BONUS: The Assmaster was delivered on a wood palette and the delivery guy said I could keep it. Awesome! He actually said, “I’m sure you don’t want the palette so I’ll take that away………….(long pause)…….or maybe you DO want it.” I say, “you mean, I can keep it?” Needless to say, I’m the proud owner of a trashed palette with touches of old blue paint. So exciting! I’m sure the boards will find it’s way into something cool like this:
 I use salvaged boards in all my message centers and craft organizers, so you’ll see this palette artfully rearranged soon. Don’t forget…….everything in both my Etsy shops (Salvaged Sanity and Destashio) is on sale through the end of the month. Use the coupon code: XMAS20 to receive a 20% discount on all your purchases. Only a few days left till the prices get put back to normal, so buy your favorites NOW!
Christmas in July Sale at Both Etsy Shops!
 For the first time ever, all items are 20% off in both my Destashio shop and Salvaged Sanity shop. The sale ends July 31st so snag your favorites now! Just use the coupon code: XMAS20 when you’re making your purchase to get the 20% discount. Please feel free to pass along the discount to all your bargain loving friends.
How did I get here?
I’m coming up on the one year anniversary of my blog and find myself needing to take stock not only of my Stash, but of the evolution of my artistic life.
One year ago I was emotionally and physically depleted. Closing my decorative paint company was what I wanted but I hadn’t figured out what to replace it with. I had also lost my passion for painting which had usually been my cure for depression (that and a lot of meds). I started this blog to challenge myself to get rid of the large amount of paint products before 2 years was up and my husband and I downsize. We plan to move closer to downtown San Diego after our daughter graduates high school.
 I had thought that I would be able to find uses for all the paint and plaster either within my home or the homes of my friends and family. The paint has been easy to use up and I have very little left. The plaster is another story. In the past year my preferences have changed and I find myself wanting calm. The plaster feels too busy for me and I have avoided using it. I will have to come up with another plan to get rid of it.
The organizational boards I’m making have become my new passion this year. Every single piece is different. It’s like putting together a puzzle and I love the challenge of fitting all the pieces together. What’s even funner is shopping to find the pieces. The boards I’m making not only allow me, but require me, to shop at flea markets, junk yards and estate sales. I have always wanted a good excuse to do it and am loving each and every treasure hunt. It’s become something my daughter and I do together and has brought us even closer. In a year when we’re not under the same roof, these outings will be something to keep us connected.
I’m so grateful for the changes this past year has brought. I am more able to give my all to my home and my family and I’m definitely more at peace.
Tomorrow I’ll be taking inventory of The Stash and reporting back my findings. Talk to you tomorrow.
Craft Supply Organizing at its Best
 I know none of you are affected by good organization the way I am….this new piece I listed today makes me a little weepy.
 This craft supply organizer was made to organize a scrapbooker. The paper holder is made from a book that’s over 12″ wide so it can handle 12″ x 12″ papers. The washi tape holders were made from old souvenir coaster holders. The have removable dowels so you can add/subtract rolls as needed. They hold 3 standard rolls each. Plus, they’re adorable.
 The bottom shelf is made of galvanized steel. I’m not sure what this thing was originally created for, but I snagged three of them in the salvage dept of my local Veteran’s Thrift Store. It’s plenty big and sturdy enough to hold all sorts of glue, paint and craft punches.
 The ribbon rack was made from an old bottle rack. I just cut them apart so they could accommodate bigger spools. They’ll hold about 4 or 5 spools each.
 It’s a beautiful piece. I love the color combo, the fabric of the book, but really, I just love the idea of someone organizing all their craft supplies. The peace that comes from seeing all your crap turned into beauty is priceless, right?
If you’re itching to get organized, please visit my Etsy Shop.
Inventory used: acrylic craft paint, latex paint, Stain & Seal
Are you The Queen of Washi Tape?
 Washi tape is all the rage right now and if you haven’t bought a roll to play with I’d like to know what you’re doing with your time. Seriously! Washi tape is almost like post-it tape on a roll. You can tape something up with it, pull it off and it doesn’t harm the surface.

Washi tape mural
The mural above was made using washi tape and when Rosa gets tired of it she can pull it down without leaving a trace of tape behind it. Great if you’re renting or in a dorm.
washi tape inspiration
As you can see, the ideas are endless and the craft companies are coming out with new tape designs every day. I’ve even seen people striping their walls with the stuff, which totally beats painting stripes, striping with paint totally sucks.
In response to the need to contain a person’s obsession, I created this washi tape cabinet.
 I found this box at a yard sale. I’m guessing it was a wine box, based on it’s size and the imprinted graphic.
 I drilled four holes on each side, big enough to insert four wood dowels. Easy peasy. Next I embellished it a little.
 Okay, so I embellished it a lot. I wallpapered the insides with this cool grey, green and copper paper, painted the side a matching green, painted the dowels copper (Royal Design Studio Copper Stencil Creme), and glazed the whole box.
The collage on the front was a ton of fun to do. I painted in the castle, added a Queen, some flowers and two angels flying with bouquets of hydrangeas. Perfect.
 This cabinet can hold 80 standard washi tape rolls. Can you even imagine?! Now, obviously, I am not The Queen of Washi Tape. This is all the tape that my daughter and I own, and to be honest, we went out and bought a few more just so this photo didn’t look pathetic (that’s the kind of sacrifice I’m willing to make for my art). But for a serious taper (not a tapir, they don’t have thumbs, just hooves) this cabinet would give them the ability to not only contain their collection, but also add to it. Nirvana!
This was a really fun piece to make and I love how it came out. If you think you might be the Queen, or know someone who is, the cabinet is for sale in my Etsy Shop now.
Inventory used: acrylic craft paints, Stain & Seal


